On this page
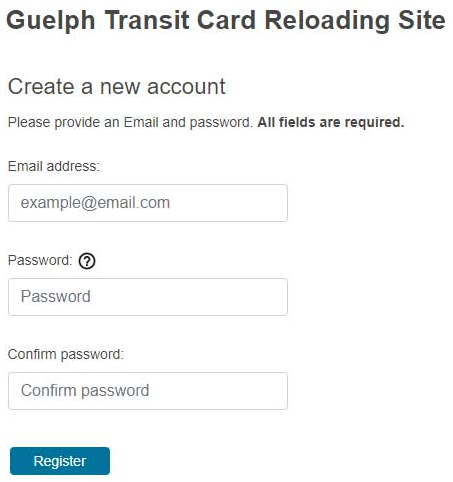
Create a new user account
- Click the ‘Register as a new user’ link on the log in page.
- The ‘Create a new account’ form will open; please fill all the fields. (Note: Use your preferred personal email address and create a password. Minimum password length is 9 characters, and must contain 1 of the following: digit, special character, lower case letter and upper case letter).
- Click the ‘Register’ button.
- Go to your email account’s inbox and find an email from [email protected] with ‘Registration’ as the subject. Click the link in the email text, it will take you to the Login page. (Check your junk inbox if you do not receive an email within a few minutes)
- Login with your email and password.
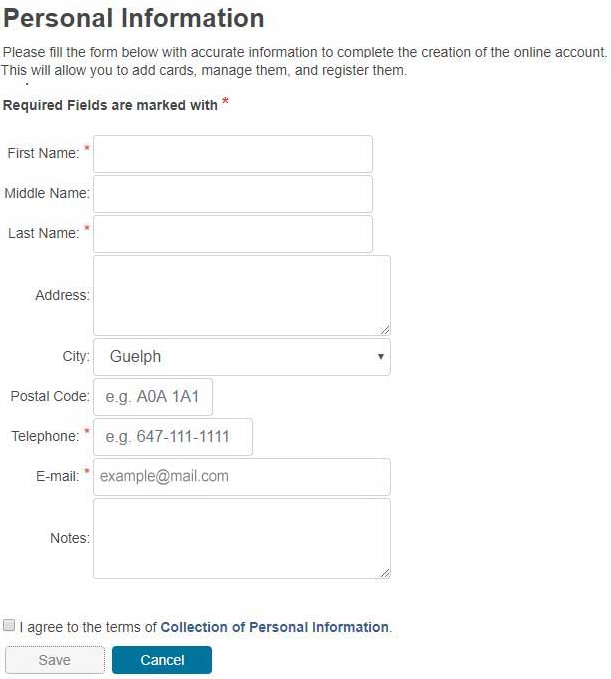
- The Personal Information form will be loaded. Please follow the instructions and complete the form. Make sure to fill in all the required fields. Note: If you have only one name as your full legal name, as issued on your government identification, please enter an * in the last name section.
- In order to save the form, you must read and agree to the terms of Collection of Personal Information. To read the terms, click ‘Collection of Personal Information’ at the bottom of the form.
- Click the ‘Save’ button.
- At this moment you should be able to add your card(s) and start using the site.
Log in
- If you already created an account, enter your email address and password on the login page.
- If you want the device to remember your login information check the ‘Remember me?’ checkbox.
- Click the ‘Login’ button.
Forgot your password?
- Click the ‘Forgot your password?’ link on the login page.
- Once the ‘Forgot your password?’ page is loaded, type your email address and click the ‘Confirm’ button.
- An email with instructions on how to reset your password will be sent to you. Check your junk inbox if you do not receive an email within a few minutes.
- Go to your inbox and find an email from [email protected] with ‘Reset Password’ as subject. Click the link in the email text. The link will expire after 60 minutes.
- Type and confirm your new password.
- Click the ‘Reset’ button.
- Click the link ‘Guelph Transit Card Reloading Site’ to log in.
Register your card
Get balance protection when you register your card. If your card is ever lost or stolen, any fare loaded on it will be protected once it is reported and the card is blocked. The fare balance can be transferred to a new card.
- Click the Manage Cards tab, and click on the Register Your Card tab, then select the card you want to register from the ‘Card Number’ list.
- Fill in the form with the card holder’s personal information. If you want to register the card under your name, check the “Use the current user information” checkbox and the fields will be filled automatically. Make sure to fill all the
required fields. Note: If you have only one name as your full legal name, as issued on your government identification, please enter an * in the last name section.
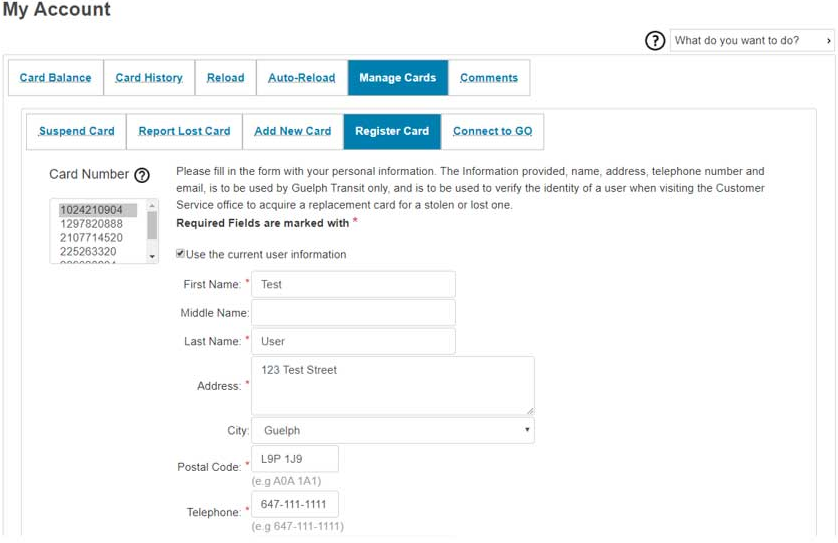
- If you agree to the terms of Collection of Personal Information, check the corresponding check box. (To read the terms press the ‘Collection of Personal Information’ link located at the bottom of the page)
- Click the ‘Save’ button. A dialog box will be displayed informing that the card was successfully registered.
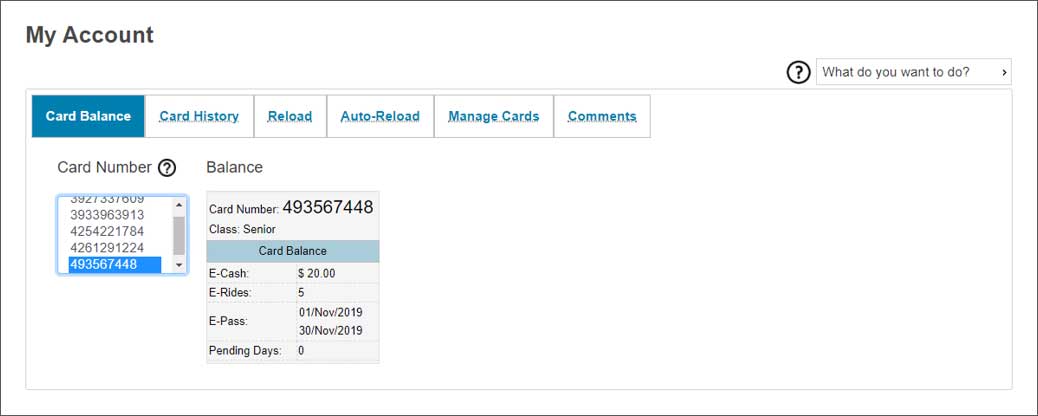
Check your balance
- Click the Card Balance tab, then select the card you want to check the balance from the ‘Card Number’ list.
- The balance section will show you the card balance. If you select a different card, the balance section will refresh automatically.
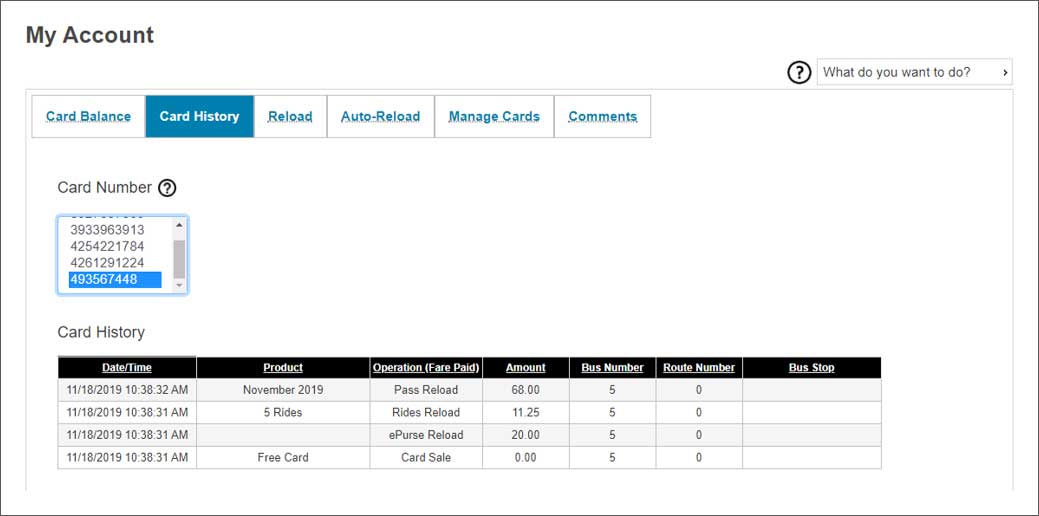
Card history
- Click the ‘Card History’ tab, then select the card you want to check the history from the ‘Card Number’ list.
- The ‘Card History’ table will refresh automatically.
- Move through the ‘Card History’ table pages using the options ‘First’, ‘Previous’, ‘Next’ and ‘Last’ located at the bottom of the grid.
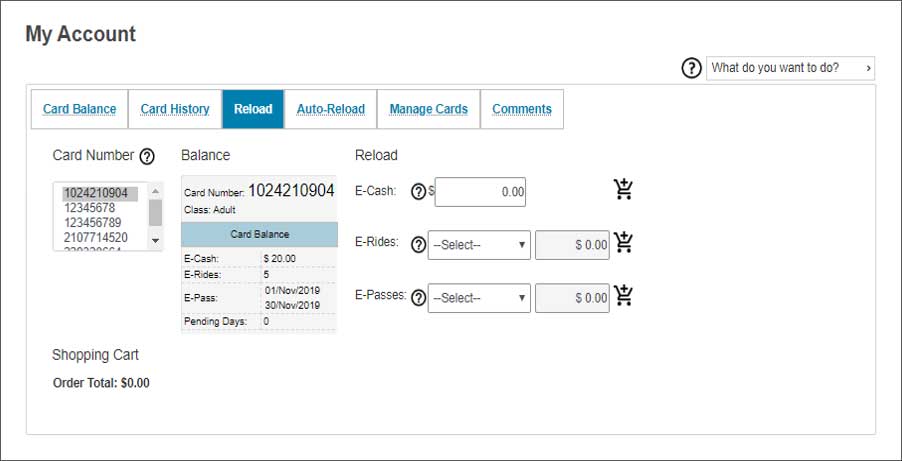
Reload
-
- Click on the ‘Reload’ tab, then select the card you want to reload from the ‘Card Number’ list. The ‘Balance’ section will refresh automatically.
- Select the product you want to add to your card:
- E-Rides: select the amount of trips you’d like to load from the dropdown menu.
- E- Pass: select the monthly pass product from the dropdown menu.
- E-cash: enter the dollar amount you would like to reload. Note that this option will charge the regular $3 fare amount, as if you are paying with cash on the bus.
-
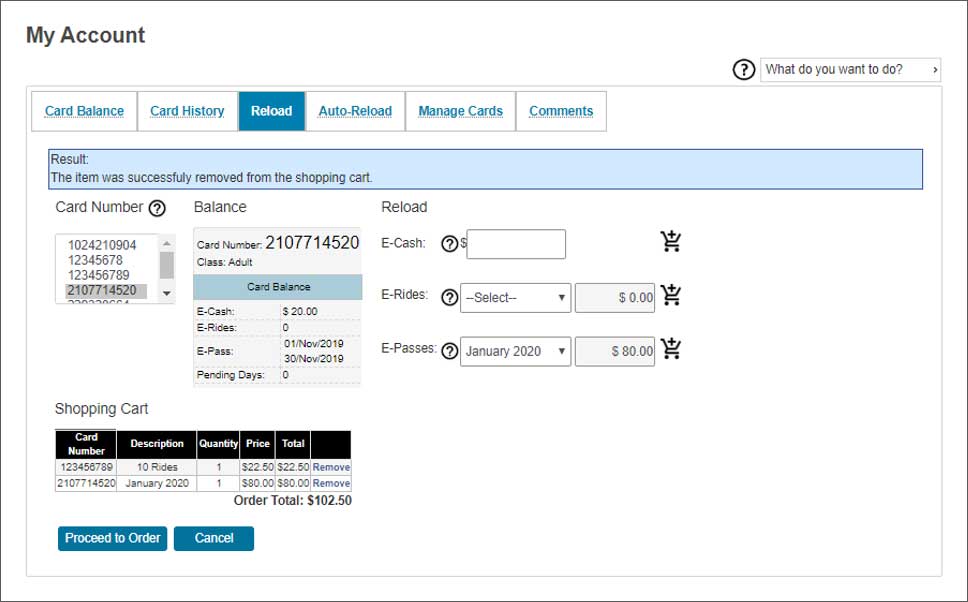
- Click the corresponding shopping cart icon to add the product to the ‘Shopping Cart.’
-
- To load multiple products, repeat steps 1 to 3 until you finish your product selections.
- Your shopping cart will display your added items and total. You can click ‘Remove” to delete one item, click the ‘Proceed to Order’ button to complete your purchase or ‘Cancel’ to empty the shopping cart.
-
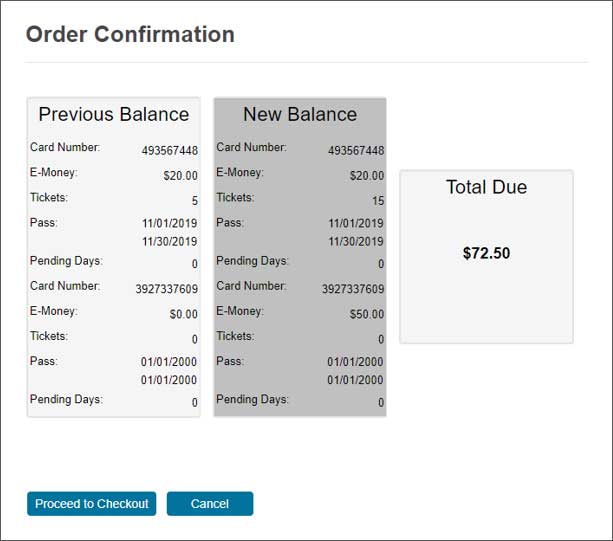
- After pressing ‘Proceed to Order’ the following Order Confirmation page will be displayed where you can ‘Proceed to Checkout’ or ‘Cancel’ your order (your shopping cart will keep the selected products).
- Click the ‘Proceed to Checkout’ button, you will be redirected to an external secure payment page.
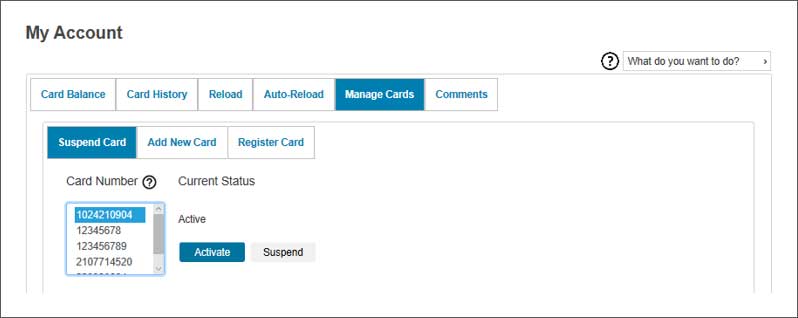
Suspend your card
- Click the ‘Manage Cards’ tab, under the ‘Suspend Card’ tab, select the card you want to suspend/activate from the ‘Card Number’ list. The actual status will be displayed in the ‘Current Status’ section.
- Press ‘Activate’ or ‘Suspend.’ A message box will be displayed informing that the card was successfully activated/suspended.
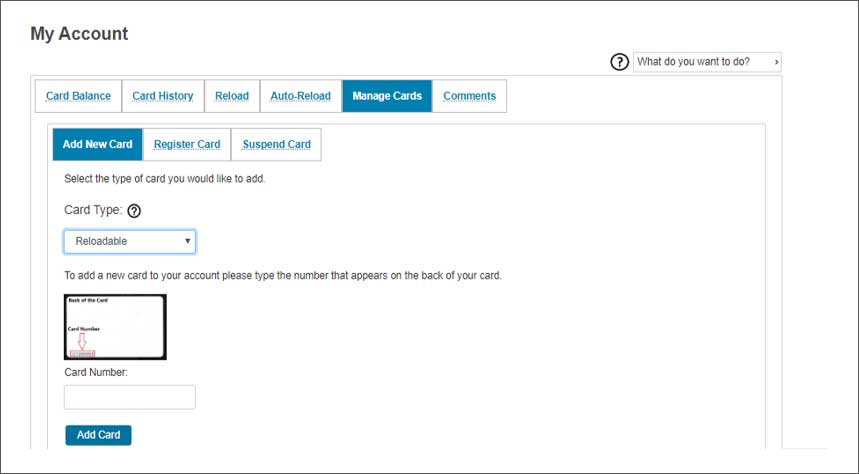
Add a new card to your account
Only reloadable cards can be managed online.
- Select ‘Reloadable’ from the drop-down menu, under ‘Card Type’.
- The card number is located on the back of the card above the barcode. Please type the card number in the Card Number text box.
- Click ‘Add Card.’
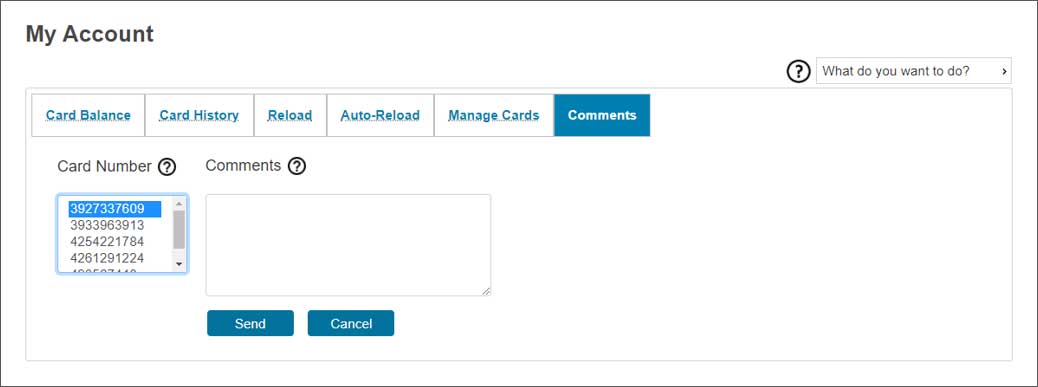
Comments
- Click the ‘Comments’ tab, then select the card from the ‘Card Number’ list that you would like to add a comment to.
- Type your comments in the text box.
- Click ‘Send’ to save the comment or ‘Cancel’ to remove or cancel entering the comment. All comments are sent to [email protected]